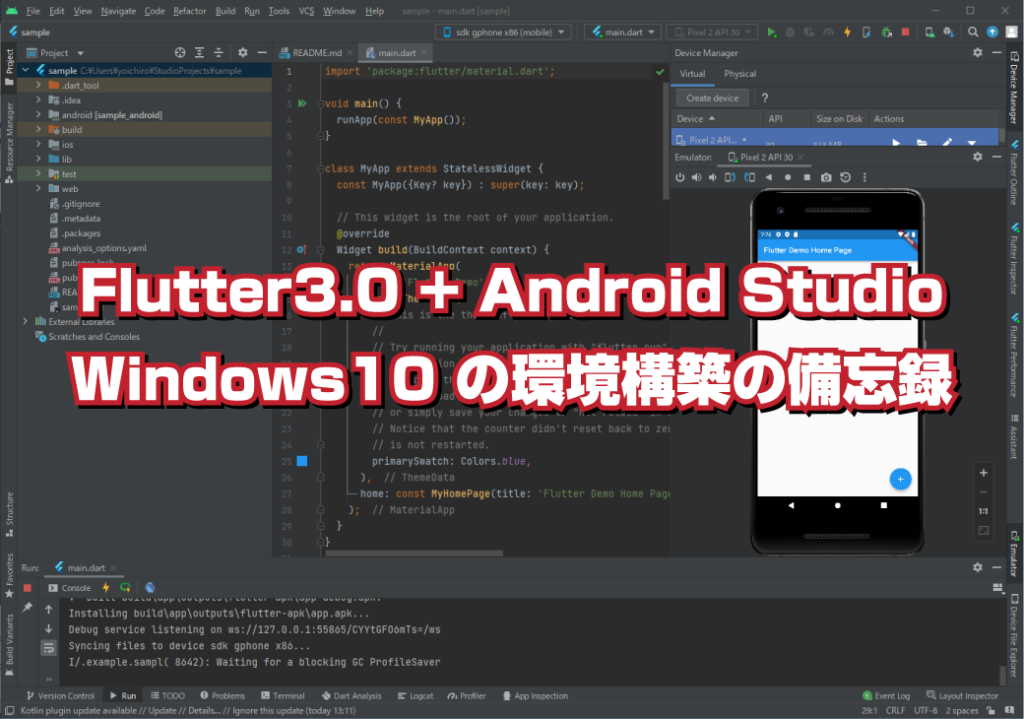
Windows10に、Flutter3.0をインストール。Android Studioでの環境構築の記録です。
ほぼ、Flutter環境構築 -Windows編-|中央コンピューターサービス株式会社(CCS) の内容を参考にさせていただきました。 但し、Flutterのバージョンが最新の3.0 なので、若干、手順に違いがあります。Android Studioについてもバージョンによる違いがあります。
Flutte3.0のインストール
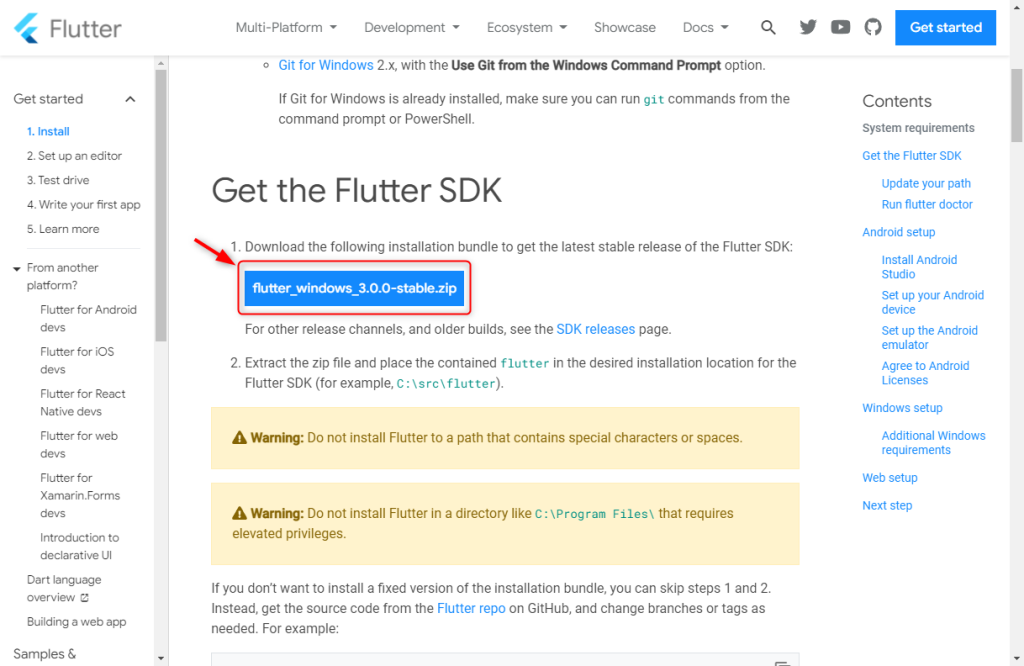
公式サイトより flutter_windows_3.0.0-stable.zip をダウンロードします。
flutter_windows_3.0.0-stable.zip を解凍して、その中にある「flutter」を任意のフォルダに配置します。

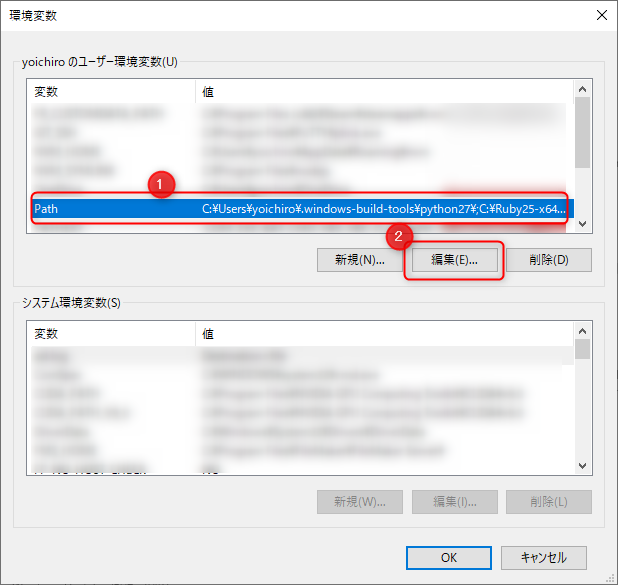
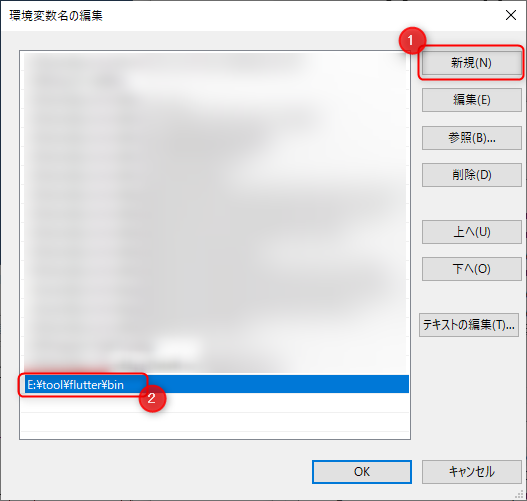
環境変数にPATHを通します。
flutter doctorで環境構築が出来ているかの確認
PowerShellにて、下記のコマンドで、Flutterの環境構築が出来ているかを確認します。
> flutter doctorFlutterの環境構築に足りないものが表示されます。
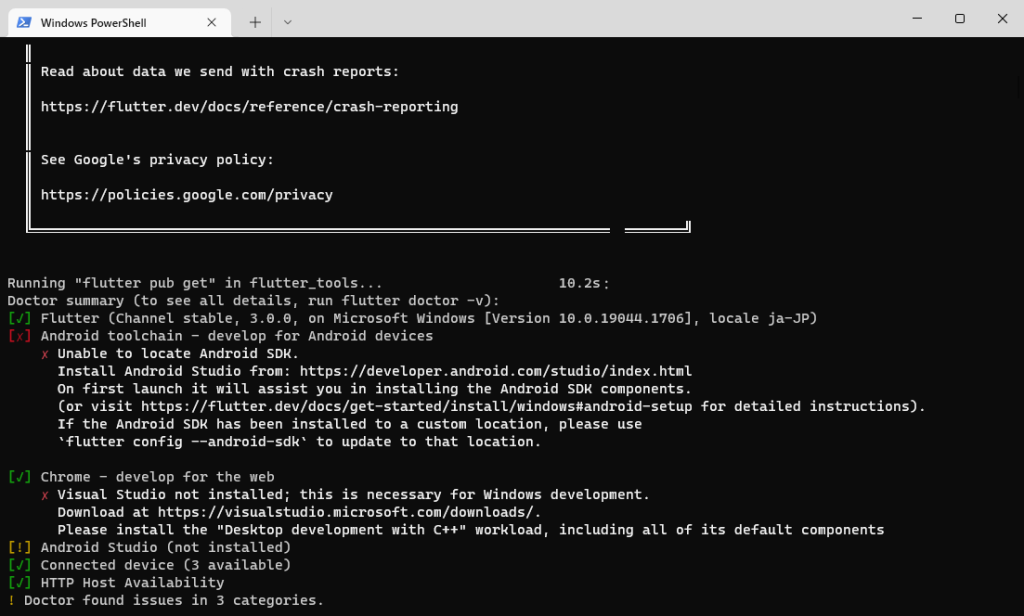
「Android Studioが必要」と表示されます。 Android Studioをインストールします。Android Studioをインストールすれば、Android toolchain(これも必要と表示されています)も一緒にインストールされます。
Android Studio のインストール
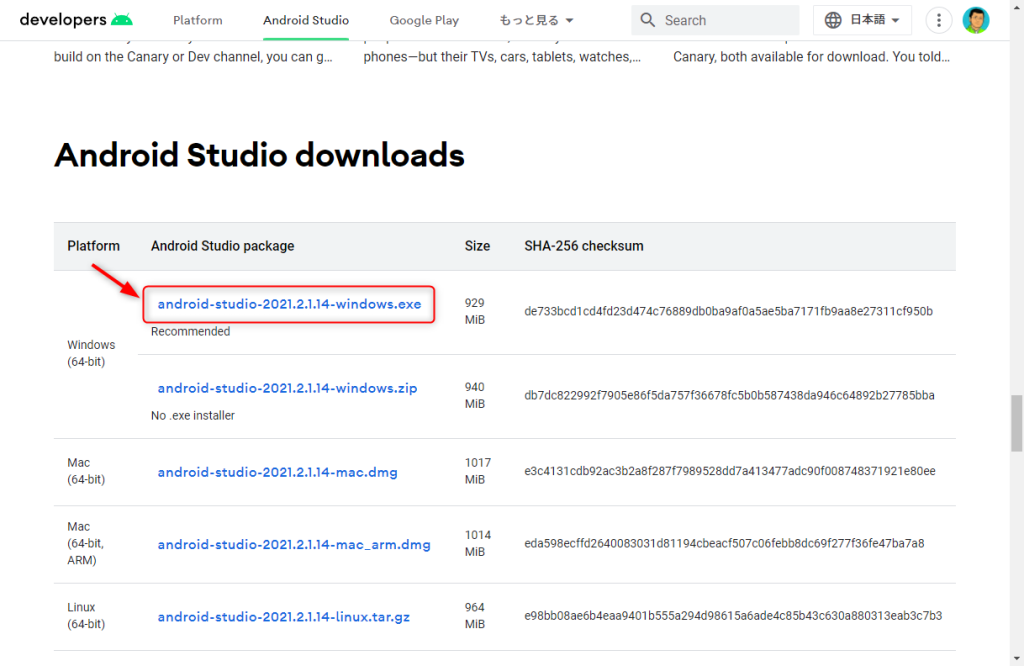
公式サイトより、 android-studio-2021.2.1.14-windows.exe をダウンロードして、インストールします。
指示に従って、インストールします。
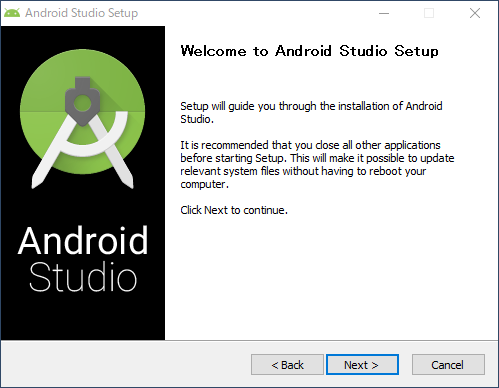
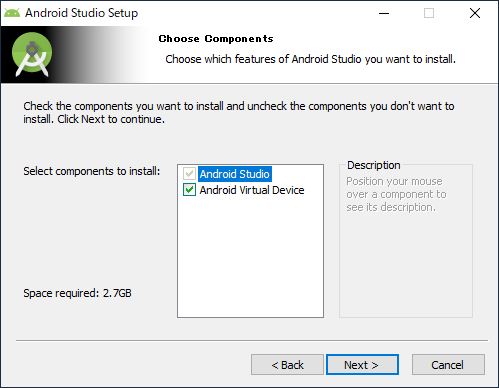

Android Studioのセットアップのウィザードがはじまります。
- Install Type に「Standard」を選択
- Select UI Themeで、お好みのUIを選択
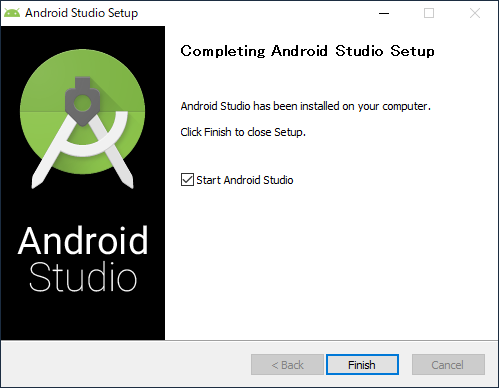
- Verify Settingでダウンロードされる内容を確認後、インストールが始まります。
インストール後、 Android Studio が起動します。
Android Studio の設定
Android Studio の設定をします。

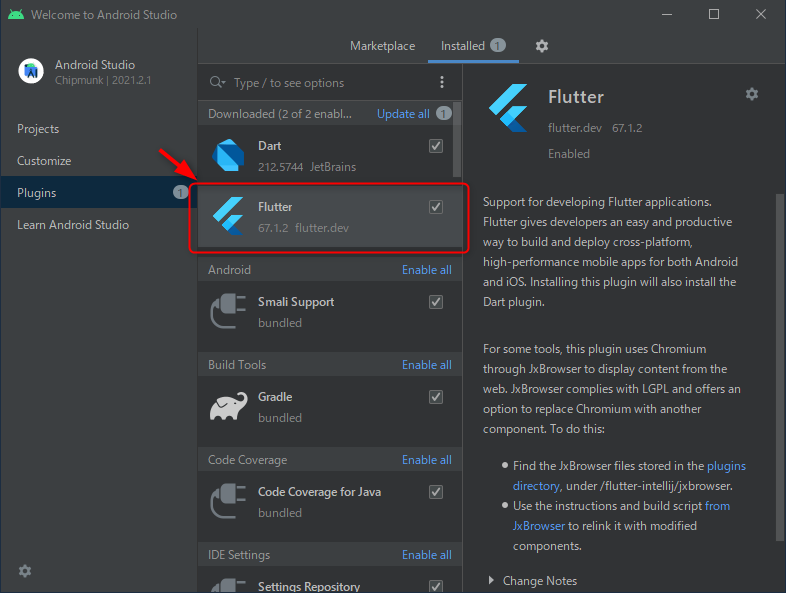
Plunginの設定をします。

FlutterのPluginをインストールします。
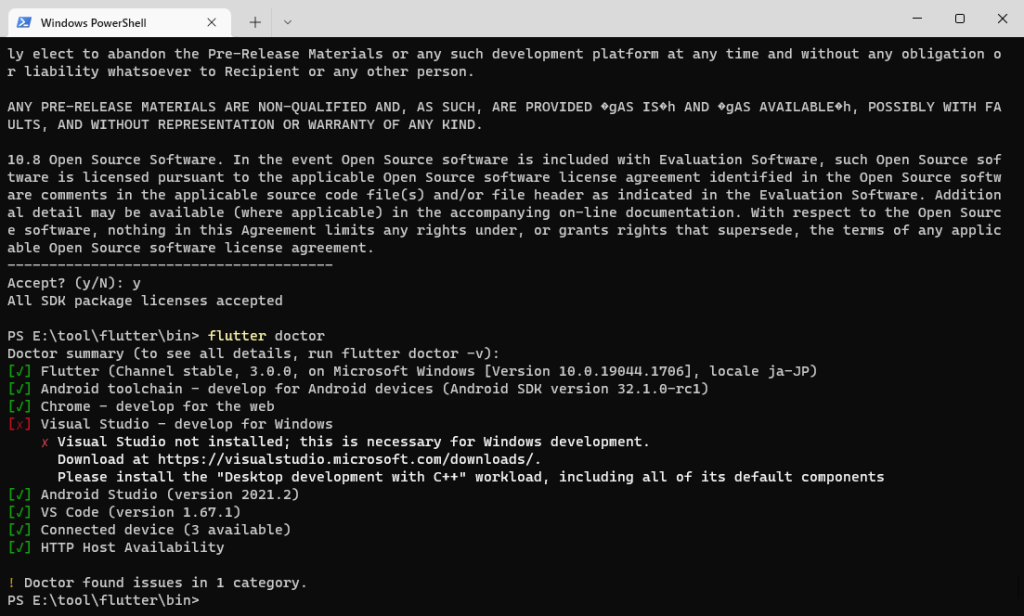
ここで再度、「flutter doctor」で確認をします。エラーが表示されます。
    X cmdline-tools component is missing
      Run `path/to/sdkmanager --install "cmdline-tools;latest"`
      See https://developer.android.com/studio/command-line for more details.
    X Android license status unknown.
      Run `flutter doctor --android-licenses` to accept the SDK licenses.
      See https://flutter.dev/docs/get-started/install/windows#android-setup for more details.
下記のサイトの記載を参考にエラーを解消しました。

再度、「flutter doctor」で確認をします。エラーが解消されました。
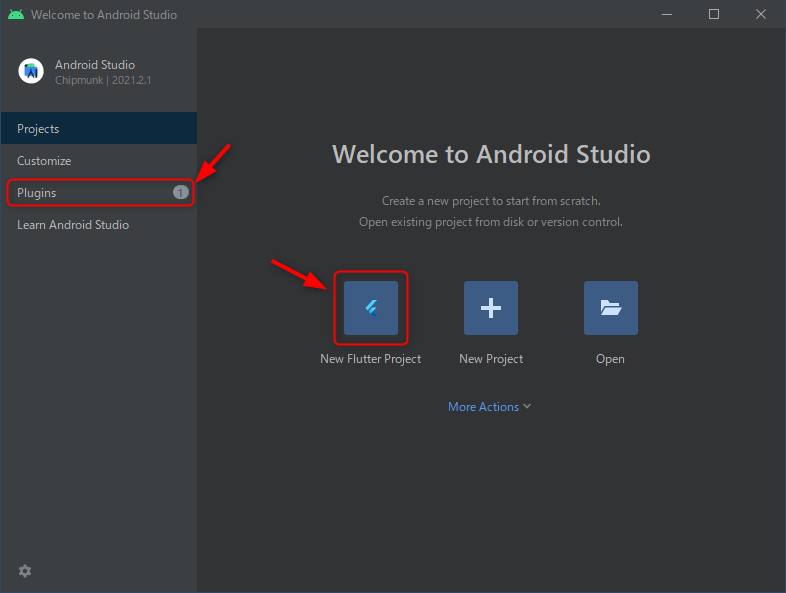
Flutterプロジェクトの作成
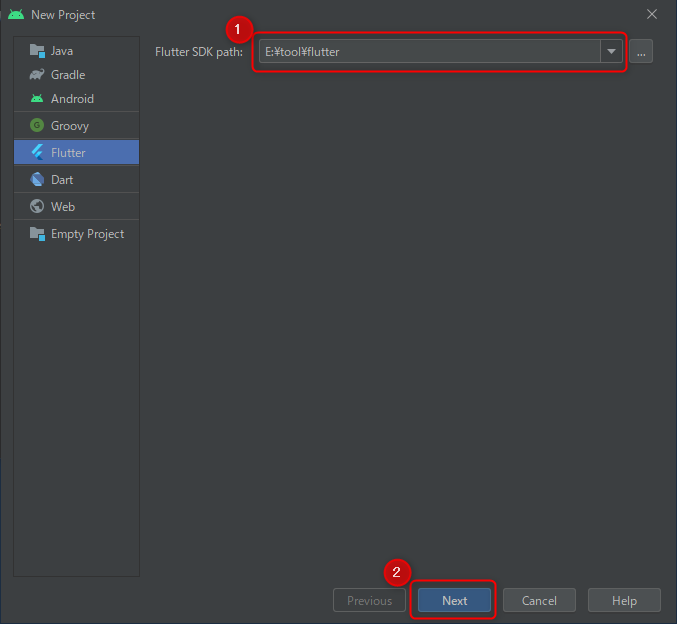
Android Studioのメインメニューより「New Flutter Project」をクリックします。
Flutter SDKのパスを指定します。
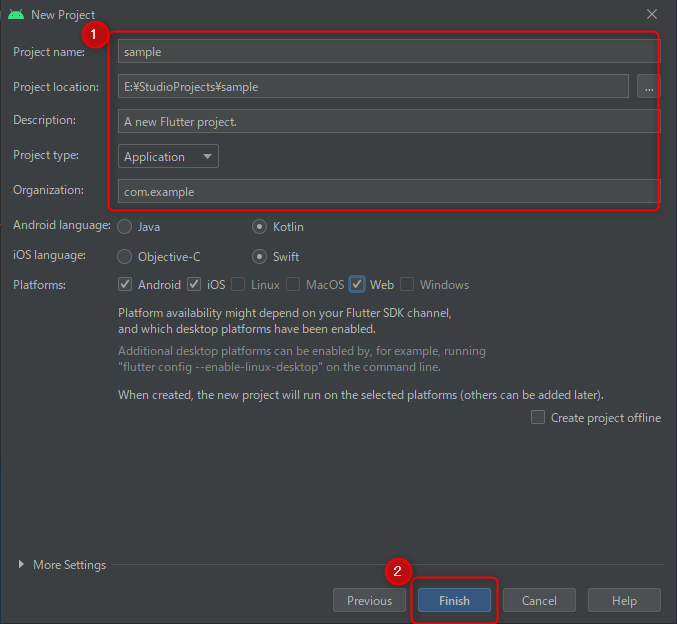
プロジェクトの情報を設定します。
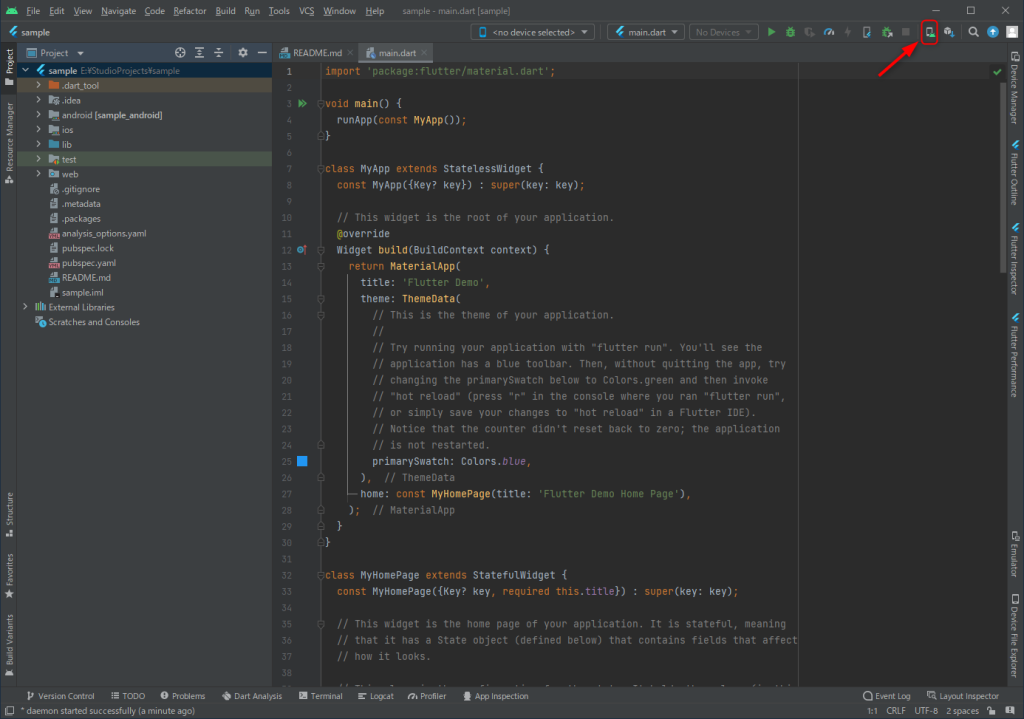
プロジェクトが起動します。Device Managerを起動します。
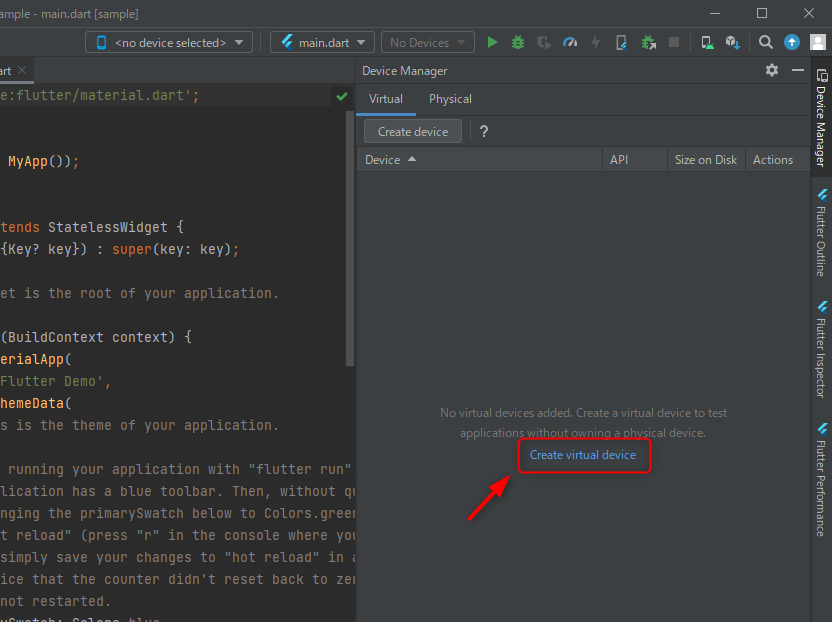
「Create virtual device」をクリックします。
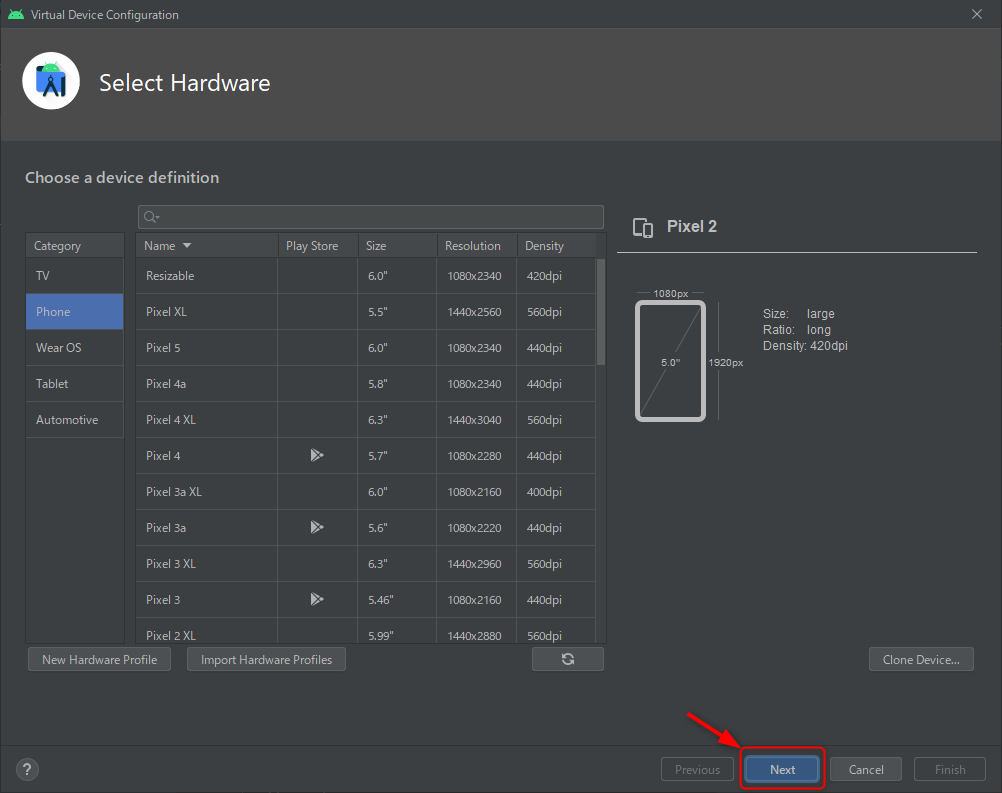
AndroidのHardwareの選択画面になります。デフォルトのPixel2を利用します。
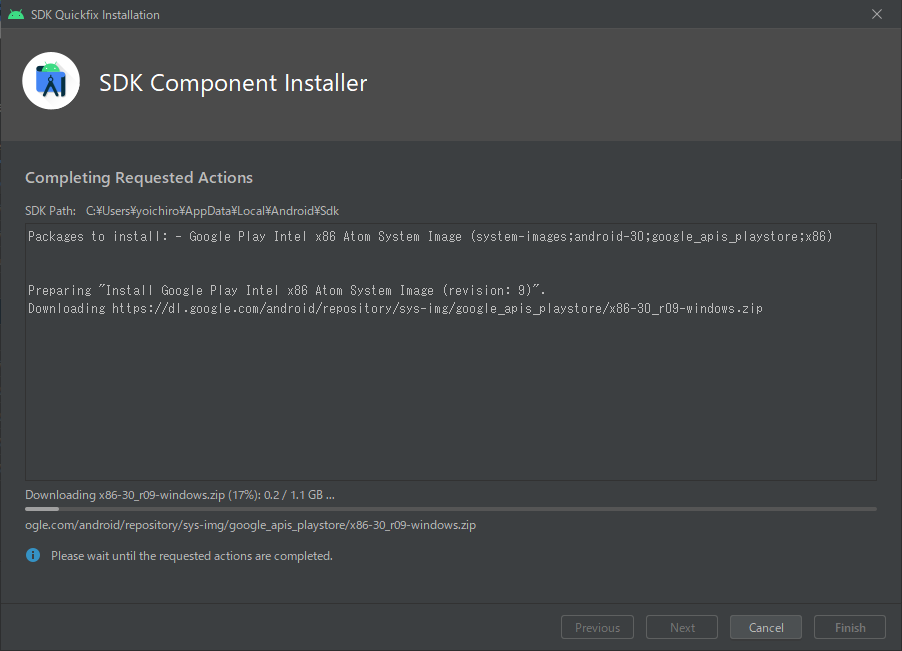
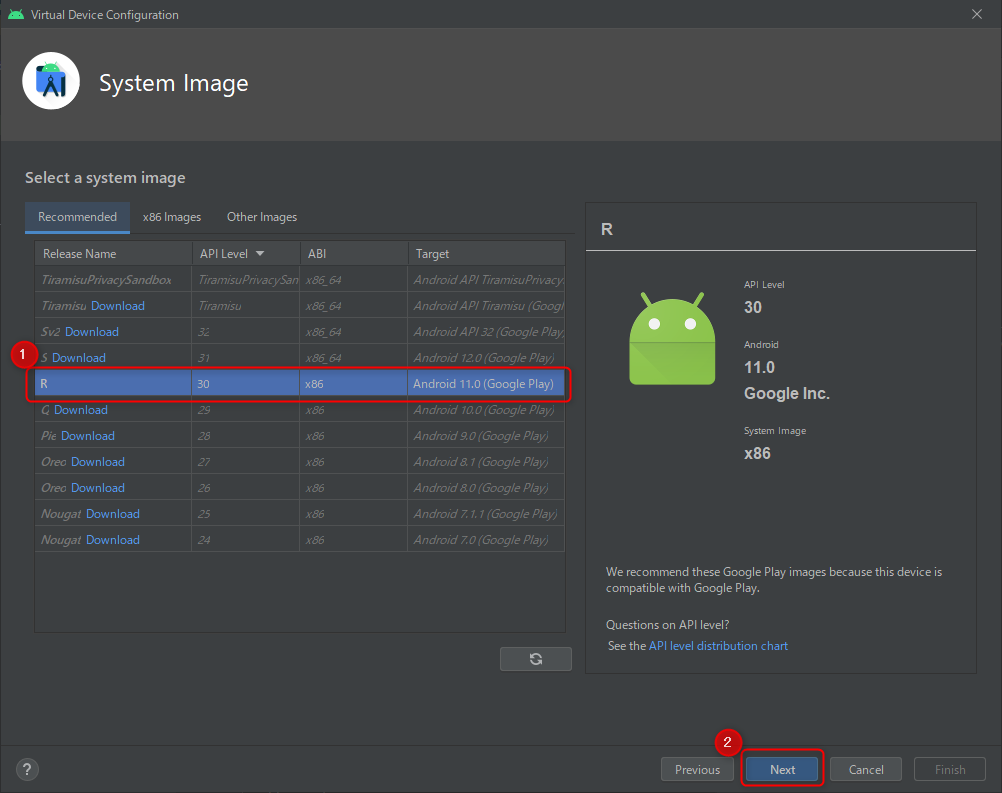
該当のライブラリをダウンロードします。
スマホ画面の縦・横の向きを選択します。
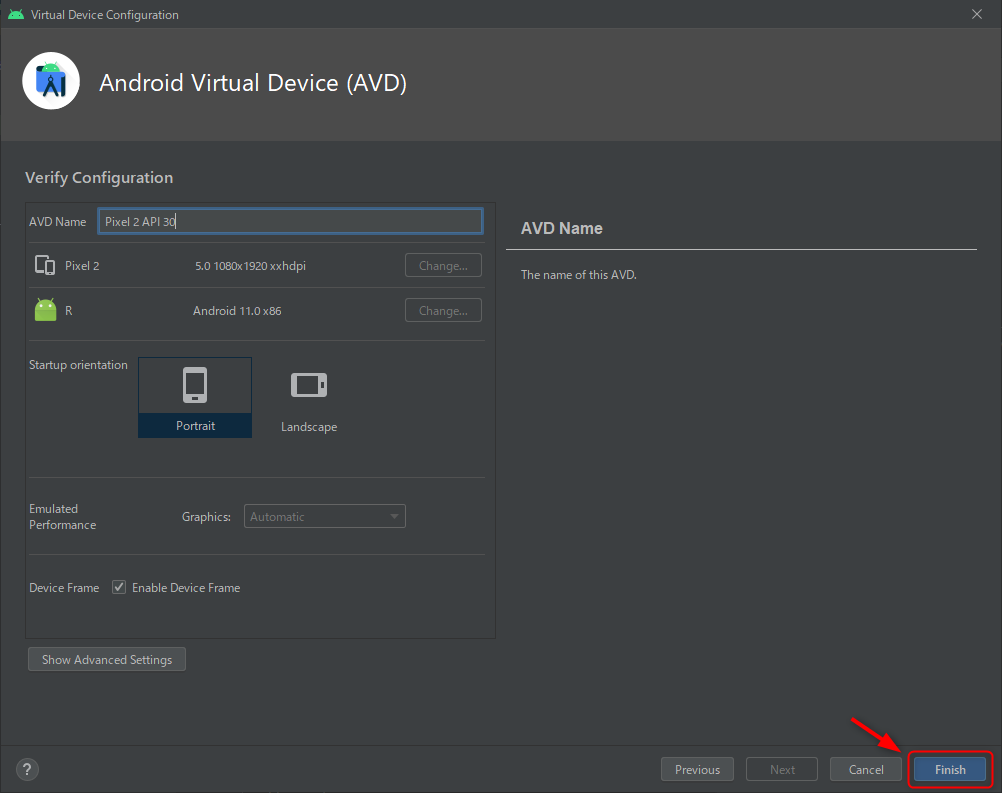
virtual device の準備が出来たので、「Pixel 2 API 30」を起動します。

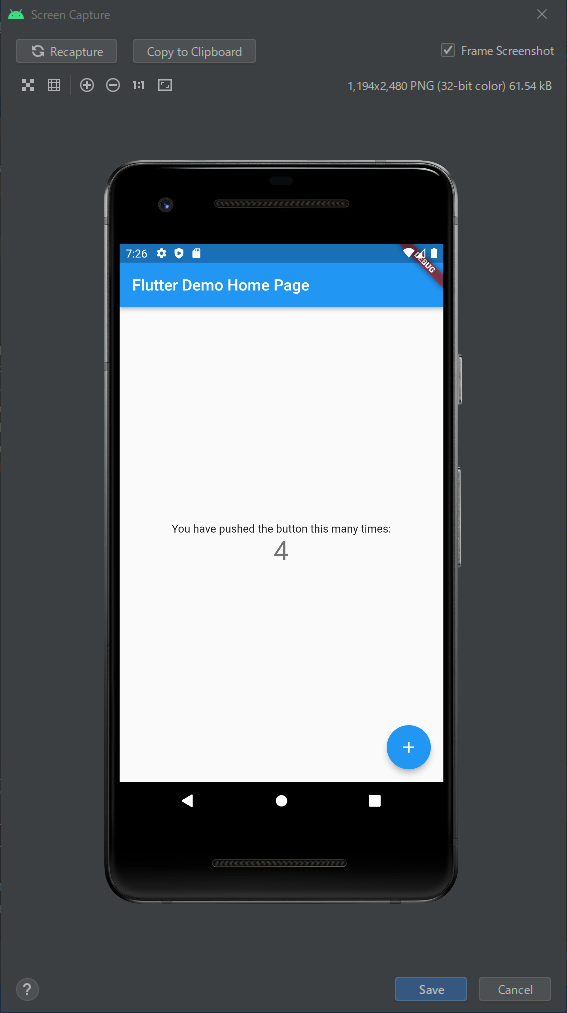
「Pixel 2 API 30」が起動しました。
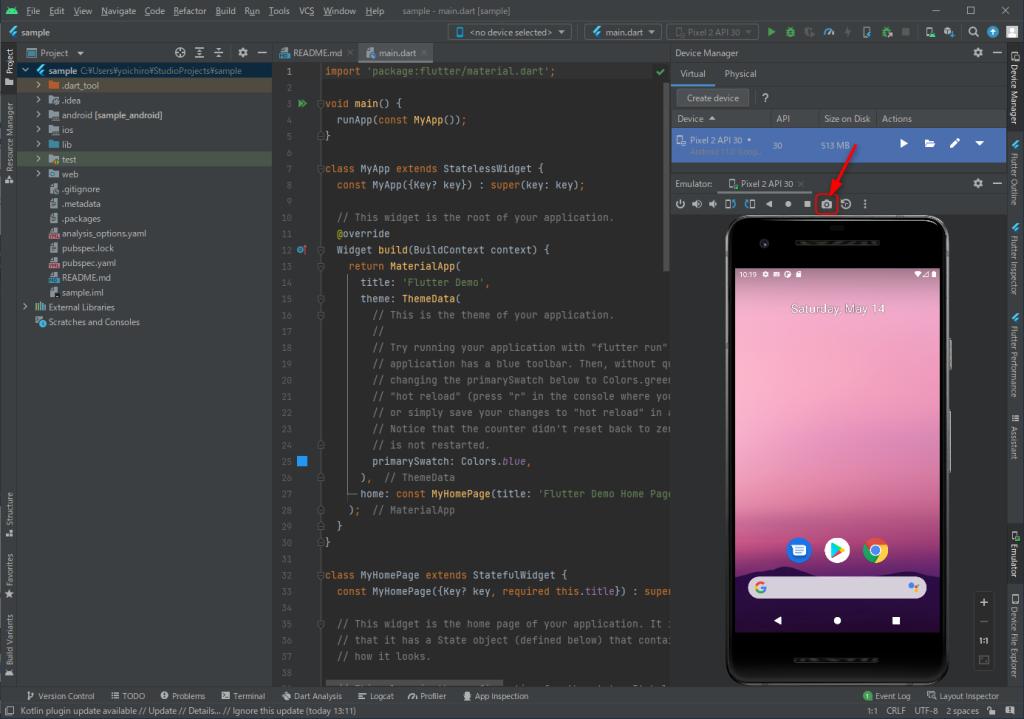
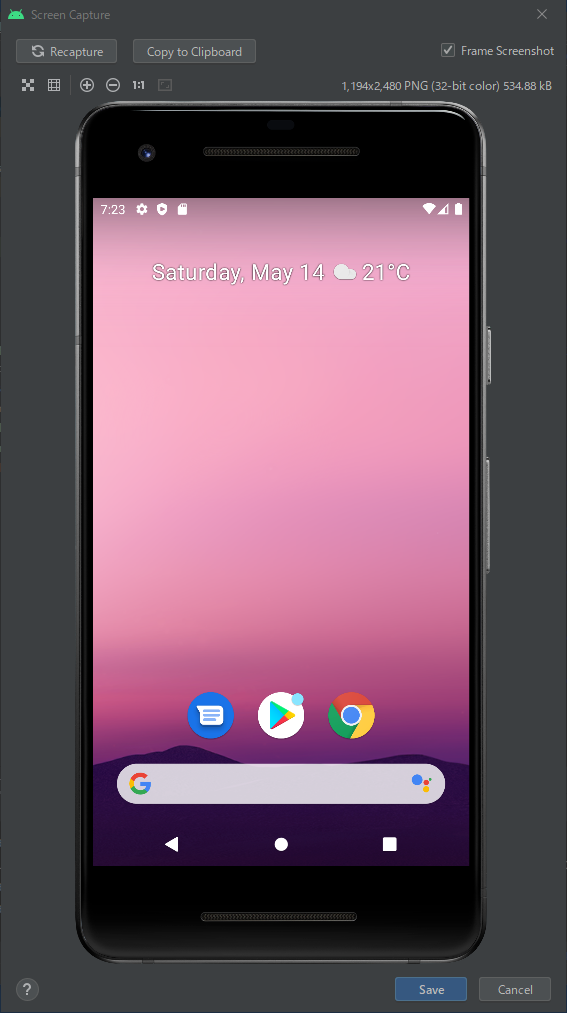
カメラのアイコンをクリックすると、スクリーンショットが撮れます。
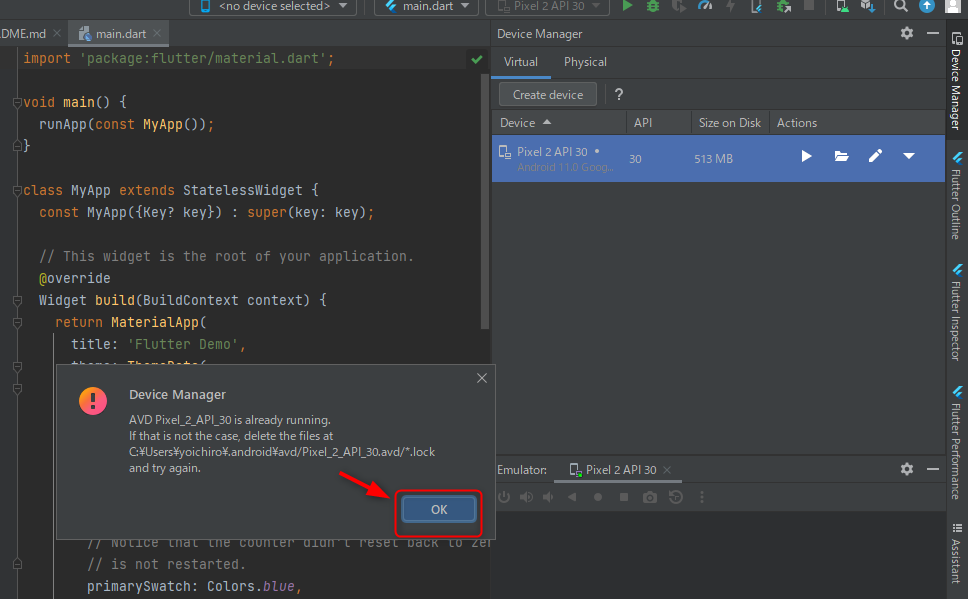
Flutter プロジェクトを起動します。

Flutter のデフォルトのサンプルアプリが起動しました。
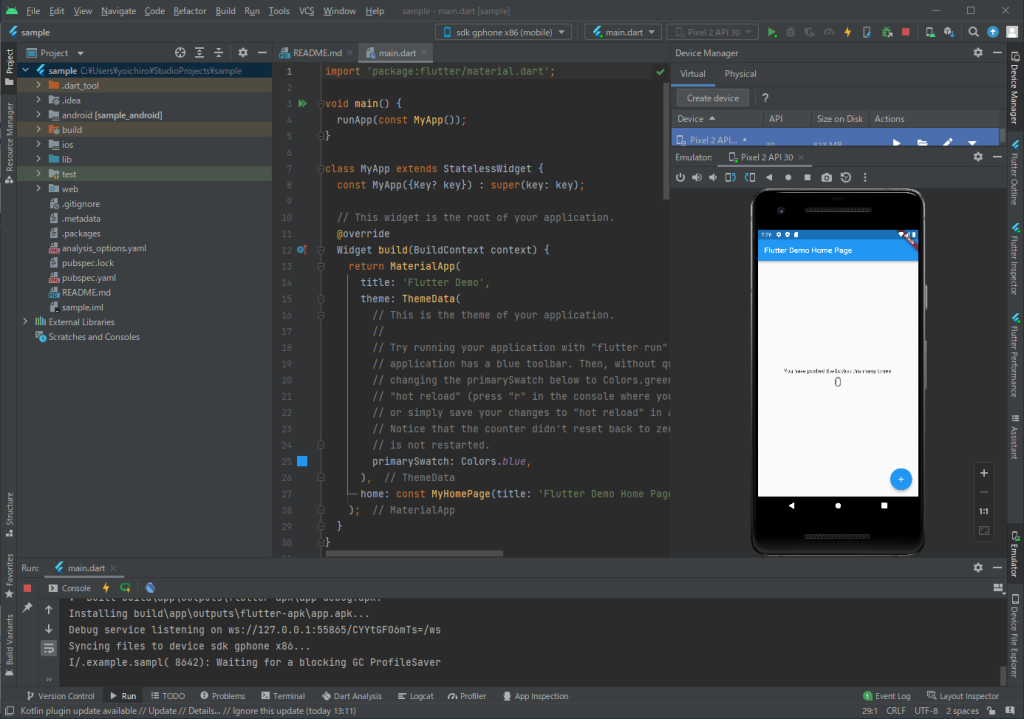
右下の「+」ボタンのクリックで数字が、カウントアップされていきます。問題なく動作しているようです。